2. Creating the artwork
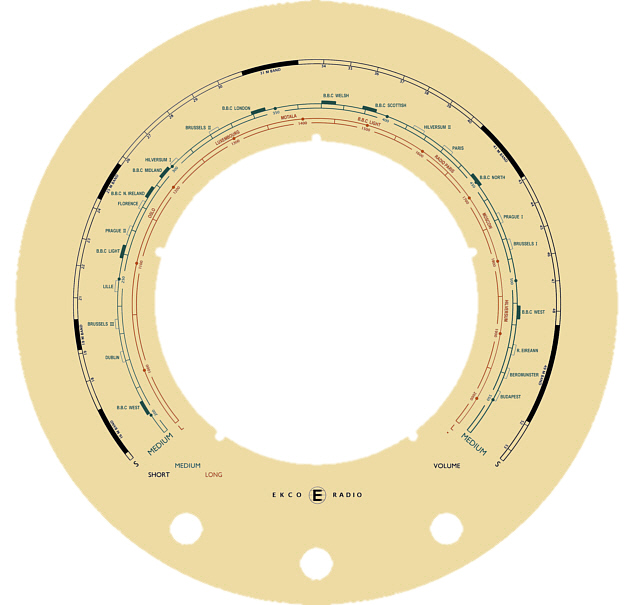
Despite initially not having an original dial to work with I could still take accurate measurements from the bakelite case of the diameter of the visible area of the dial and by taking further measurements from appropriate dial images I could place the dial legends and details fairly accurately.
I achieved this by noting the X,Y co-ordinates using my graphics software of all the major detail, such as frequency markers, station name positions, and so on. From this co-ordinate information and knowing the co-ordinates of the exact centre of the dial I could calculate the angular position of all the dial details to transfer to my reproduction.
After several evenings work I had completed my first attempt. Considering it was achieved by using visual estimates taken from images I was more than happy with the result.
A few months later I obtained an original Type-2 dial to work with. This enabled me to return to my dial artwork again in order to produce a version that followed the original more faithfully and with greater accuracy.
I initially scanned the dial and turned the resulting image into a master reference. This ensured that all the dial detail was very accurately located in the reproduction version.
Eventually, I managed to obtain a further A22 set which had the alternate Type-1 dial fitted and I was able to produce a reproduction artwork of this particular dial as well.
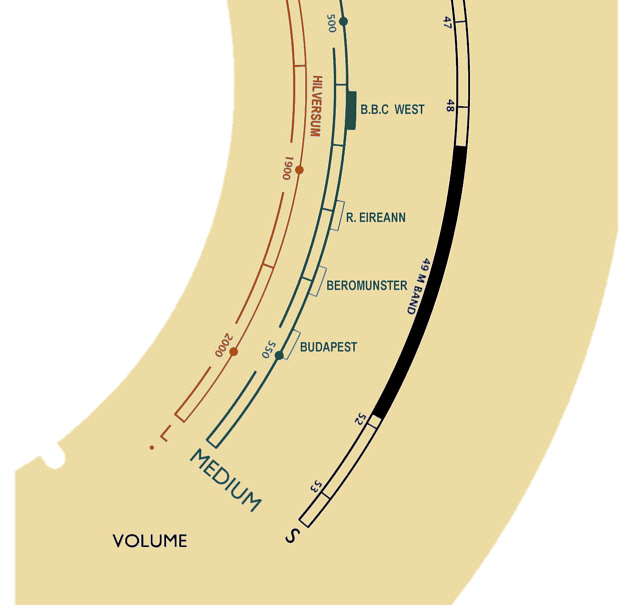
The graphics software I use is quite old and lacks any "layers" function. However by assigning a single colour of the palette to each legend I was able to simulate this, obviously red to long wave, green to medium wave and so on.
In fact this was how the original dials would have been screen printed, using just three or four legend colours and the background colour.
At this point the particular colour shades used was not important. When the artwork was complete the legend colours and background could be varied independently of each other to achieve the correct colour match to those used in an original dial.